How to Install a Window the Proper Way: A Step-by-Step Guide
Installing a new window is more than simply placing the unit into an opening and securing it with screws. A proper window installation helps prevent air leaks, water intrusion, drafts, and premature damage while also improving energy efficiency and the overall appearance of your home.
Whether you’re replacing an old window or installing a new-construction window, taking the time to prepare the opening and follow the manufacturer’s installation requirements is essential. Here at RESCOM Products – we offer the majority of the accessory items to install windows/doors, check out this link to see what we have available: Window/Door Accessories
What You’ll Need
Before getting started, gather the necessary tools and materials. Depending on the type of window and installation, you may need:
- Tape measure
- Level
- Drill/driver
- Screws or fasteners specified by the window manufacturer
- Utility knife
- Pry bar
- Hammer
- Shims
- Flashing tape or an approved flashing system
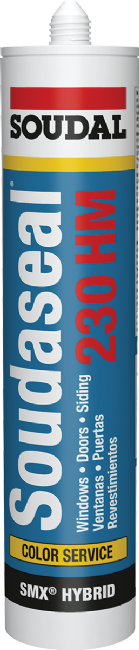
- Exterior-grade sealant
- Low-expansion window and door foam
- Backer rod, if required
- Safety glasses and gloves
Always check the window manufacturer’s instructions before beginning. Installation requirements can vary significantly between window types and manufacturers.
Step 1: Measure the Opening
Accurate measurements are one of the most important parts of a successful window installation.
Measure the rough opening in several locations for both width and height. Check the opening from side to side and top to bottom, because older openings are not always perfectly square.
The new window should fit within the manufacturer’s specified rough-opening tolerances. Don’t assume that an opening that looks correct will automatically provide the proper clearance.
Tip: Measure twice before ordering the window. A small measurement error can create major installation problems later.
Step 2: Remove the Existing Window
If you’re replacing an existing window, carefully remove the old unit without unnecessarily damaging the surrounding framing.
Remove the sash, trim, fasteners, and old window according to the type of window being replaced. Once the opening is exposed, inspect the framing carefully.
Look for:
- Rot or soft wood
- Mold or signs of prolonged moisture
- Damaged sheathing
- Improper previous flashing
- Gaps or cracks around the opening
Any damaged structural material should be repaired before installing the new window.
Step 3: Prepare the Opening
The rough opening needs to be clean, dry, sound, and properly prepared for water management.
Remove old caulk, debris, loose materials, and damaged flashing. Make sure the sill is reasonably level and that the framing is suitable for fastening the new window.
This is also the time to correct problems with the opening. Installing a new window over damaged or wet framing can simply hide the problem until it becomes more expensive to repair.
Step 4: Install the Sill Flashing
Proper flashing is one of the most important parts of window installation.
Install the sill flashing or sill pan according to the window manufacturer’s instructions and applicable building requirements. The flashing should direct water toward the exterior rather than allowing it to collect inside the wall.
The exact flashing sequence depends on the wall construction and window design. Follow the manufacturer’s details rather than relying on a generic method.
Remember: Sealants alone should not be treated as a substitute for a properly designed flashing system.
Step 5: Dry-Fit the Window
Before applying sealant, place the window into the opening to confirm that it fits correctly.
Check that:
- The window is oriented correctly.
- The frame has adequate clearance.
- The sill is properly supported.
- The unit can be positioned square and level.
- The operating portions of the window have room to function properly.
If something doesn’t look right, stop and correct it before fastening the window.
Step 6: Apply the Exterior Sealant
Apply an approved exterior-grade sealant in the locations specified by the window manufacturer.
Be careful not to seal areas that are intentionally designed to drain. Some windows have drainage paths or weep holes that must remain open.
The goal isn’t to seal every possible opening indiscriminately. The goal is to create a controlled water and air barrier while allowing the window’s drainage system to work as designed.
Step 7: Set the Window in the Opening
Carefully place the window into the prepared opening.
Center the unit and make sure it is sitting correctly on the sill support. Avoid forcing the window into an opening that is too small.
Once the window is positioned, temporarily secure it and begin checking it with a level.
Step 8: Level, Plumb, and Square the Window
This is where patience pays off.
Check the window in multiple directions:
- Level: The sill and head should be properly aligned.
- Plumb: The side jambs should be vertical.
- Square: The diagonal measurements should be equal or within the manufacturer’s tolerance.
Use shims where required to maintain the proper position.
Don’t simply tighten fasteners until the frame looks secure. Over-tightening can distort the frame and cause the window to operate poorly.
Step 9: Secure the Window
Fasten the window using the fasteners and fastening locations specified by the manufacturer.
Drive the fasteners carefully and avoid pulling the frame out of alignment.
After securing the unit, operate the window several times. It should open, close, lock, and seal properly without excessive force.
If the window binds, rubs, or doesn’t latch correctly, check the installation before continuing.
Step 10: Insulate Around the Frame
Once the window is properly secured and functioning, fill the space between the window frame and rough opening with an appropriate insulation material.
Low-expansion window-and-door foam is commonly used for this purpose, but the manufacturer’s instructions should determine what material is appropriate.
Don’t overfill the cavity. Excessive expanding foam can place pressure on the frame and interfere with window operation.
Step 11: Complete the Exterior Flashing
Finish the exterior flashing according to the manufacturer’s instructions and the building’s water-resistive barrier system.
The flashing should integrate with the surrounding wall assembly so that water is directed away from the opening.
This step is especially important because a window can be installed perfectly square and still leak if the flashing is incorrectly installed.
Step 12: Install Interior and Exterior Trim
After the installation has been inspected and the appropriate sealants and flashing are complete, install the interior and exterior trim.
Exterior trim should be properly sealed where required while still allowing any designed drainage paths to function.
Inside the home, install casing or other finish materials to create a clean transition between the window and wall.
Step 13: Perform a Final Inspection
Before considering the job finished, inspect the entire installation.
Check that:
- The window is level and plumb.
- The frame is square.
- All required fasteners are installed.
- The window operates smoothly.
- Locks and latches work properly.
- Weep holes are unobstructed.
- Flashing is correctly installed.
- Sealant joints are continuous where required.
- There are no obvious gaps or exposed openings.
- Interior and exterior trim are properly secured.
If the manufacturer provides a specific inspection or testing procedure, follow it.
Common Window Installation Mistakes to Avoid
Even a high-quality window can perform poorly when installed incorrectly. Some of the most common mistakes include:
Skipping the Flashing
A bead of caulk around the window isn’t a replacement for proper flashing. Water management needs to be designed into the installation.
Installing Over Damaged Framing
Rotten or deteriorated framing should be repaired before the new window goes in.
Failing to Check Square
A window can appear level while still being out of square. Always check the frame according to the manufacturer’s tolerances.
Over-Tightening Fasteners
Too much pressure can distort the frame and cause operating problems.
Using Too Much Expanding Foam
Excessive foam can put pressure on the window frame. Use an appropriate low-expansion product and follow its instructions.
Blocking Drainage Holes
Never seal or cover designed weep holes or drainage channels.
Ignoring Manufacturer Instructions
Window installation details differ between products. The manufacturer’s instructions should take priority over generic installation advice.
When Should You Hire a Professional?
Window installation can be a manageable project for an experienced DIYer, but it can also involve structural framing, exterior weatherproofing, and building-code requirements.
Consider hiring a qualified professional if the opening has structural damage, significant water intrusion, unusual wall construction, or if you’re unsure how the window should be integrated with the building’s weather-resistive barrier.
For larger projects, permits or inspections may also be required depending on your local jurisdiction.
Final Thoughts
A proper window installation is about much more than getting the window to fit inside the wall. The best installations address water management, air sealing, insulation, structural fastening, and proper alignment as one system.
Take your time with measurements, prepare the opening correctly, follow the manufacturer’s installation instructions, and don’t rush the flashing and sealing steps. A carefully installed window can provide reliable performance for many years while helping keep your home comfortable, dry, and energy efficient.